
Welcome! This manual unlocks the full potential of your new Oral-B Pro 3, detailing features and functionalities for a superior cleaning experience.
This guide is designed to help you maximize your product’s benefits, offering a comprehensive overview of its capabilities and ensuring optimal oral hygiene.
The Oral-B Pro 3 provides a pathway to a healthier, brighter smile, and this manual will guide you through every step of the process.
What’s in the Box?
Upon opening your Oral-B Pro 3 package, you should find the following components carefully included to ensure a seamless start to your oral hygiene journey. First, there’s the Oral-B Pro 3 handle itself – the core of your new electric toothbrush. You’ll also receive one brush head, specifically designed for effective cleaning and gum care.
Additionally, the box contains a charging station, essential for keeping your toothbrush powered and ready for use. A handle charging cable is also included, connecting the charging station to a power outlet. Don’t forget the instruction manual – this very document! – providing detailed guidance on setup, usage, and maintenance.
Finally, you’ll find a quick start guide for a rapid overview of the essential functions. Please verify that all these items are present before proceeding. If anything is missing, contact Oral-B customer support for assistance.
Key Features of the Oral-B Pro 3
The Oral-B Pro 3 is packed with features designed to elevate your brushing experience and improve your oral health. A standout feature is the 3 cleaning modes – Daily Clean, Whitening, and Sensitive – allowing you to customize your brushing to your specific needs. The built-in 2-minute timer ensures dentists-recommended brushing duration, while the quadpacer signals every 30 seconds to guide you to brush each quadrant of your mouth equally.
Furthermore, the Pro 3 boasts a pressure sensor, protecting your gums from excessive force. This vital feature alerts you if you’re brushing too hard, preventing potential damage. The round brush head is engineered to cup each tooth, delivering a superior clean compared to manual toothbrushes. Enjoy a noticeably cleaner mouth and healthier gums with these innovative features!
Setting Up Your Oral-B Pro 3
Get ready to experience a superior clean! This section will guide you through the simple steps of preparing your Oral-B Pro 3 for optimal performance.
Follow along to quickly and easily set up your new toothbrush and begin your journey to a healthier smile.
Charging the Handle
Initial Charge: Before your first use, it’s crucial to fully charge the Oral-B Pro 3 handle. Place the handle into the charging station, ensuring a firm connection. The initial charge typically takes approximately 16 hours to achieve maximum battery capacity.
Charging Indicator: During charging, the charging indicator light on the handle will illuminate. The light may pulse or remain solid, depending on the charging stage. Once fully charged, the indicator light will typically turn off or display a different color, signifying completion.
Charging Station Placement: Position the charging station on a stable, flat surface near a power outlet. Avoid placing it in areas exposed to excessive moisture or extreme temperatures.
Battery Life: A fully charged Oral-B Pro 3 handle provides up to two weeks of brushing, assuming twice-daily brushing sessions of two minutes each. However, actual battery life may vary based on usage patterns and selected cleaning modes.
Maintaining Battery Health: To prolong battery life, it’s recommended to occasionally fully discharge the handle before recharging.
Attaching the Brush Head
Proper Alignment: To attach the brush head to the Oral-B Pro 3 handle, align the brush head with the metal shaft on the handle. Gently push the brush head onto the shaft until it clicks securely into place. You should feel and hear a distinct click, confirming a proper connection.
Removal Process: To remove the brush head, press the power button briefly, then gently pull the brush head straight off the metal shaft. Avoid twisting or applying excessive force, as this could damage the handle or brush head.
Compatibility: The Oral-B Pro 3 is compatible with a wide range of Oral-B brush heads, including CrossAction, FlossAction, and Sensitive Clean.
Secure Fit: Always ensure the brush head is firmly attached before starting your brushing session. A loose brush head can detach during use, potentially causing discomfort or injury.
Regular Checks: Periodically check the brush head attachment to ensure it remains secure throughout its lifespan.
Using Your Oral-B Pro 3 for the First Time
Initial Setup: Before your first use, ensure the handle is fully charged and a brush head is securely attached for optimal performance.
Begin with a gentle brushing experience, familiarizing yourself with the various cleaning modes available on your new device.
Choosing the Right Cleaning Mode
Oral-B Pro 3 offers multiple cleaning modes designed to cater to your specific oral hygiene needs. Understanding these modes is crucial for maximizing the benefits of your electric toothbrush.
Daily Clean is the standard mode, perfect for everyday brushing, providing a thorough clean for all areas of the mouth. Pro-Clean delivers a more intense cleaning experience, ideal for removing stubborn plaque and surface stains.

For sensitive teeth and gums, the Sensitive mode offers a gentler brushing action, reducing irritation. Whitening mode polishes the teeth, helping to remove surface stains and brighten your smile.
Experiment with each mode to discover which best suits your preferences and dental health requirements. Remember to consult your dentist for personalized recommendations on the most appropriate cleaning mode for you.
Proper mode selection enhances cleaning effectiveness and promotes long-term oral health.
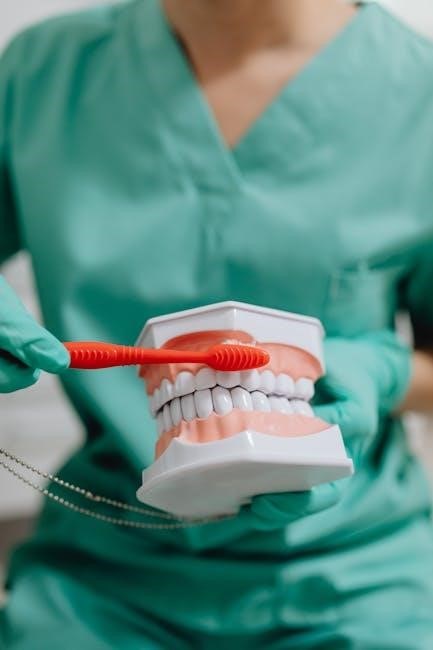
Proper Brushing Technique
Achieving optimal cleaning with your Oral-B Pro 3 requires mastering the correct brushing technique. Divide your mouth into four quadrants: upper right, upper left, lower right, and lower left.
Position the brush head at a 45-degree angle towards the gumline, ensuring gentle contact. Apply light pressure, allowing the brush to do the work. Avoid scrubbing vigorously, as this can damage gums and enamel.
Brush each quadrant for 30 seconds, following the built-in timer. Move the brush slowly from tooth to tooth, covering all surfaces – front, back, and chewing surfaces.
Remember to brush your tongue to remove bacteria and freshen breath. Rinse your mouth thoroughly with water after brushing. Consistent, proper technique is key to maintaining excellent oral health.
Following these steps will maximize the effectiveness of your Oral-B Pro 3 and contribute to a healthier, brighter smile.

Maintaining Your Oral-B Pro 3
Regular upkeep ensures longevity and peak performance of your Oral-B Pro 3. Consistent cleaning and timely brush head replacements are essential practices.
Proper maintenance safeguards your investment and guarantees a consistently fresh and effective brushing experience.
Replacing the Brush Head
Optimal cleaning relies on a fresh brush head. Dentists recommend replacing your Oral-B Pro 3 brush head every three months, or sooner if bristles are frayed or worn. Frayed bristles reduce cleaning effectiveness and can harbor bacteria.
To replace, gently pull the old brush head straight off the handle. Align the new brush head with the handle and firmly push it onto the metal shaft until it clicks into place. Ensure a secure connection for optimal oscillation and cleaning power.
Oral-B offers a variety of brush heads designed for specific needs – whitening, sensitive gums, deep cleaning, and more. Explore these options to personalize your oral hygiene routine. Regularly checking and replacing your brush head is a simple yet crucial step towards maintaining a healthy and vibrant smile.
Cleaning the Handle
Maintaining hygiene extends to the Oral-B Pro 3 handle itself. After each use, rinse the handle thoroughly under running water, ensuring no toothpaste residue remains. Avoid submerging the charging base in water; simply wipe it clean with a damp cloth.
Periodically, you can wipe down the handle with a soft, damp cloth and a mild, non-abrasive cleaning solution. Do not use harsh chemicals or abrasive cleaners, as these can damage the handle’s finish. Pay attention to the area where the brush head connects, removing any accumulated debris.
Proper handle cleaning prevents the buildup of bacteria and ensures the longevity of your toothbrush. A clean handle contributes to a more hygienic and effective oral care experience, supporting your overall dental health. Regular cleaning is a simple habit with significant benefits.
Advanced Features & Troubleshooting
Explore enhanced functionality! This section details the pressure sensor and timer, offering solutions to common issues for optimal performance and a superior clean.
Pressure Sensor Explained
Protect your gums! The Oral-B Pro 3 features a smart pressure sensor, a vital component for maintaining optimal oral health. This intelligent system actively monitors the force you apply while brushing. If you brush too hard, the pressure sensor will automatically illuminate a warning light on the handle.
This visual cue signals you to reduce the pressure, preventing potential damage to your gums and tooth enamel. Excessive force can lead to gum recession and increased tooth sensitivity over time. The pressure sensor isn’t just a warning; it’s a guide to help you achieve the perfect brushing balance.
Consistent use of the pressure sensor promotes healthier gums and a more comfortable brushing experience. Remember, effective cleaning doesn’t require aggressive scrubbing – gentle, thorough movements are key! Pay attention to the light, and adjust your technique accordingly for a healthier, happier smile.
Timer Functionality & Importance
Achieve dentist-recommended cleaning! Your Oral-B Pro 3 incorporates a built-in timer, designed to ensure you brush for the dentist-recommended two minutes. This isn’t just a random timeframe; it’s the optimal duration for effectively removing plaque and bacteria from all areas of your mouth.
The toothbrush pulses briefly every 30 seconds, signaling you to move to a different quadrant of your mouth – upper right, upper left, lower right, and lower left. This quad-pacing feature guarantees even cleaning across your entire mouth, preventing you from neglecting certain areas.
Consistent use of the timer promotes thoroughness and helps establish healthy brushing habits. Don’t rush! Allow the timer to guide you, ensuring each quadrant receives adequate attention. A two-minute brushing routine, guided by the Oral-B Pro 3’s timer, is a cornerstone of excellent oral hygiene.
Oral-B Pro 3 Specifics
Explore unique features! This section details brush head compatibility and how to effectively utilize the convenient Travel Mode for optimal oral care on the go.
Compatibility of Brush Heads
Understanding Brush Head Options: The Oral-B Pro 3 is designed with compatibility in mind, allowing you to utilize a variety of Oral-B brush head types to personalize your cleaning experience. This includes options like the CrossAction, FlossAction, Sensitive Gum Care, and Whitening brush heads.
CrossAction provides a thorough clean with angled bristles reaching deep between teeth. FlossAction incorporates floss-like fibers for enhanced plaque removal. Sensitive Gum Care features ultra-soft bristles for gentle cleaning, ideal for those with sensitive gums. Whitening brush heads are designed to polish away surface stains for a brighter smile.
Generally, Oral-B Pro series brush heads are interchangeable. However, always check the packaging to ensure compatibility with your specific Pro 3 model. Using non-Oral-B brush heads may damage the handle or reduce cleaning effectiveness. Regularly replacing your brush head (every 3 months) is crucial for maintaining optimal hygiene and performance.
Travel Mode Usage
Activating Travel Mode: The Oral-B Pro 3 features a convenient Travel Mode designed to conserve battery life during trips. To activate, simply press the power button after the brush is already running in another mode. This reduces the oscillation speed, extending the brushing time per charge.
Benefits of Travel Mode: This mode is particularly useful when access to a charger is limited. It allows for a full two-minute clean, even with reduced power. Remember to deactivate Travel Mode upon returning home to ensure you’re receiving the full cleaning power of your Pro 3.
Indicator: There isn’t a specific visual indicator for Travel Mode activation, but you’ll notice a reduced brushing intensity. Always ensure your brush head is securely attached when using Travel Mode for optimal performance. Proper storage in the travel case is also recommended to protect your brush during transit.

Safety Information & Warranty
Read carefully! Prioritize safety with precautions, and understand your Oral-B Pro 3’s warranty details for registration and coverage information.
Ensure proper use and maintenance to maximize product lifespan and maintain warranty validity.
Important Safety Precautions
Crucially, always disconnect the Oral-B Pro 3 from the power source before cleaning or replacing the brush head. Never use the appliance with a damaged cord or plug, and avoid operating it in water. This device is not intended for use by persons (including children) with reduced physical, sensory, or mental capabilities, or lack of experience and knowledge, unless supervised.
Close supervision is necessary when the appliance is used near children. Do not allow children to use the appliance as a toy. Regularly inspect the handle and brush head for damage, and discontinue use if any damage is detected. Avoid applying excessive pressure during brushing, as this can damage gums and teeth. If irritation occurs, discontinue use and consult a dental professional. Never attempt to disassemble or repair the appliance yourself; contact Oral-B customer service for assistance.
Keep the charging base away from water sources and ensure it is placed on a stable surface.
Warranty Details & Registration
Your Oral-B Pro 3 is covered by a two-year warranty against defects in materials and workmanship from the date of purchase. This warranty does not cover damage resulting from misuse, abuse, or unauthorized repairs. To make a warranty claim, proof of purchase is required, such as a receipt or invoice.
Registering your product online at the official Oral-B website ([invalid URL removed]) is highly recommended. Registration allows you to receive important product updates, exclusive offers, and streamlines the warranty claim process if needed. The registration process typically requires your product’s serial number, purchase date, and contact information.
For warranty service or assistance, please contact Oral-B customer service through their website or by phone. Retain your proof of purchase and warranty information for future reference. Full warranty terms and conditions are available online.